

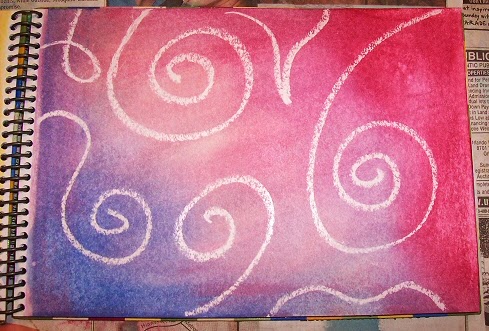
Start by using your clear wax crayon to make a design on the paper. I have a stash of Easter egg color kit "magic crayons" that I use just for this purpose. It will be hard to see your design, so I usually stick to abstract swirls and random squiggles. You could always try colored paper I suppose, but keep in mind that will alter your ink hues too. Then choose your ink colors - in the examples here I used Rubber Stampede's dye based inks in the little single serving size pads. Here's where you need to work quick: Spritz the paper lightly with water so that the entire piece is just damp, then apply the inks directly to the paper (DTP) by rubbing and swirling them around until you get the coverage that you want, blending them around and on top of each other. You will instantly see the design appear where the wax crayon "resists" the ink. Then I use the spray bottle to spritz droplets of water onto the paper, randomly and using varying pumps of the sprayer (from fine mist to large splats of water) to further water down the ink on the page - and once they dry completely the effect is pretty cool:

Closeup detail from same page:

And thats really it - you can add as much or as little (or none!) water as you like, and you can leave it as droplets like I did here, (I did it in layers with a fine mist on the bottom - letting that dry - then dropping larger splatters on top of that) or use a damp paper towel to wick up some of the drops and remove even more of the color. Or use the same to smooth and blend the colors further - up to you, just play around with it! Of course how yours turns out will depend on the paper and / or inks used (some papers will suck up the ink too fast or other dye inks will bleed through and not blend as nicely) but it's such a quick and easy process you really can't go wrong, so just try everything - at the worst you'll end up with a bunch of scrap BG papers to use in collages and other altered art stuff!

Thats it for today - I do have a different background making technique I'll post another day - it's my main "go-to" style when I need to make BGs for use in ATCs or art squares or 4x6 collages or whatever ... so 'til next time!
~ gem ~
1 comment:
This is actually pretty useful! Thanks for sharing this! I think I'll give this a shot during the weekend when I'm in the mood to play with paper!
Post a Comment